
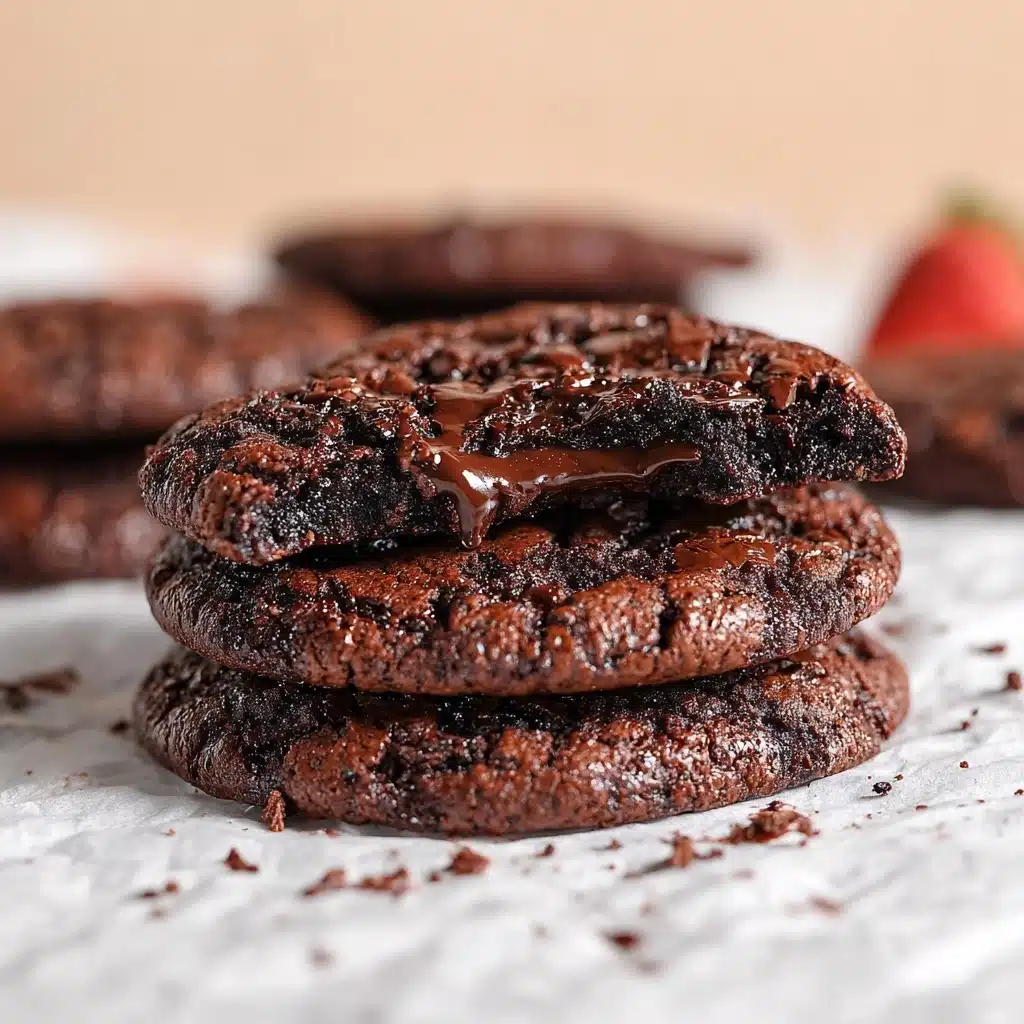
Chocolate Lava Cookies Recipe
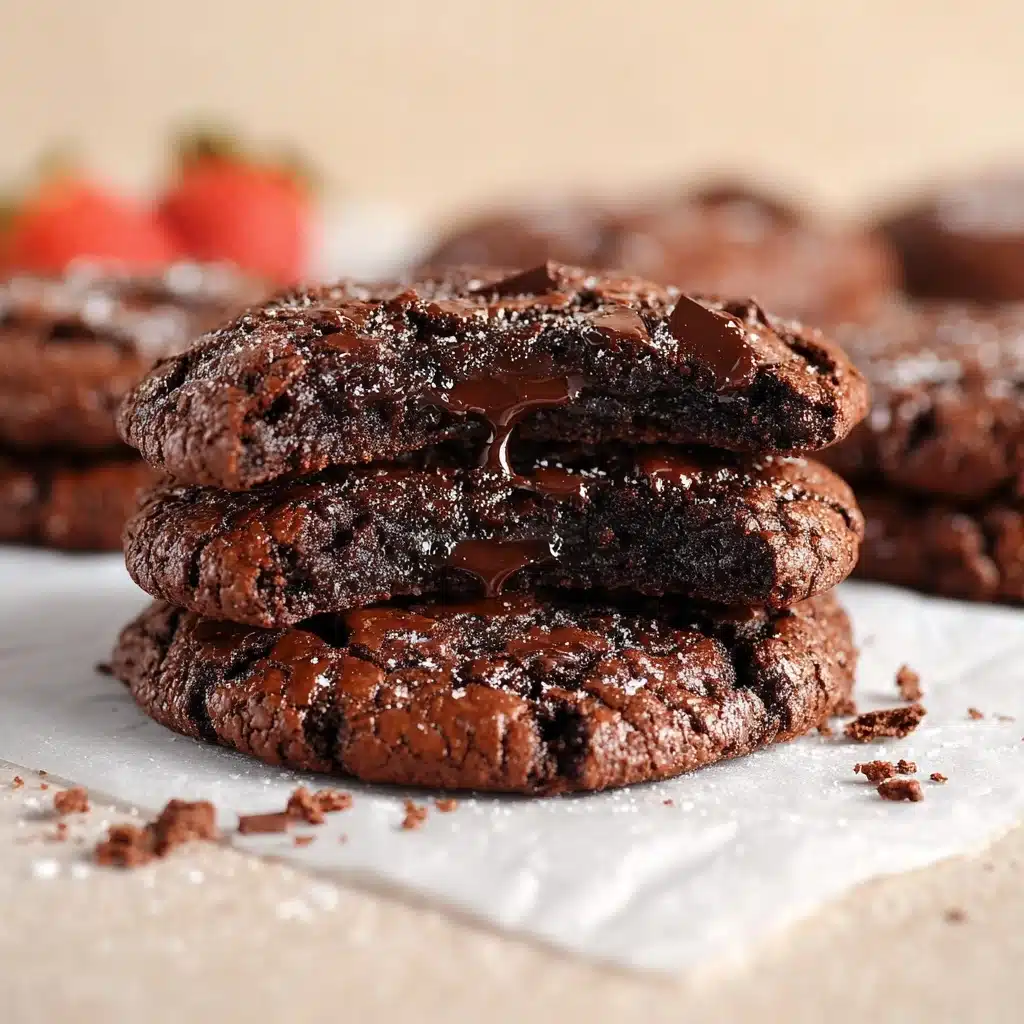
If you’re on the hunt for a heavenly cookie experience that combines the comfort of classic chocolate chip and the drama of molten lava cake, look no further than these Chocolate Lava Cookies. Imagine breaking through a tender, crackly exterior to unleash a gooey, rivers-of-chocolate center — these are the decadent treats you whip up for someone you truly adore (or, honestly, just for yourself). Whether you’re sharing with friends or sneaking them late at night, Chocolate Lava Cookies are pure, indulgent bliss in every bite.
Ingredients You’ll Need
The magic of Chocolate Lava Cookies starts with simple pantry staples, but each ingredient is carefully chosen to create that signature texture and flavor. Here’s a closer look at what makes every one of these cookies so unforgettable.
- All-purpose flour: Forms the sturdy-yet-tender structure that holds the molten center in place without being dry.
- Unsweetened cocoa powder: Brings rich, deep chocolate flavor and gives these cookies their striking dark hue.
- Baking powder: Helps the cookies puff just the right amount for a soft, cakey texture.
- Salt: Balances sweetness and enhances that rich chocolate profile — don’t skip it!
- Semi-sweet chocolate (10 oz, divided): The true chocolate lava hero: some is melted into the dough, while the remainder gets tucked inside for that gooey core.
- Unsalted butter: Adds creaminess and richness to the dough, ensuring a melt-in-your-mouth bite.
- Granulated sugar: Provides sweetness and helps create those shiny, crackly tops.
- Brown sugar, packed: Infuses each cookie with a hint of caramel flavor and extra chewiness.
- Large eggs: Bind everything together and lend extra moisture for that luscious texture.
- Vanilla extract: Deepens flavors and rounds out the intense chocolatey notes.
How to Make Chocolate Lava Cookies
Step 1: Prepare Dry Ingredients
Start by whisking together the flour, cocoa powder, baking powder, and salt in a medium bowl. Taking the time to sift or whisk ensures no lumps and makes the dry ingredients evenly distributed, translating to the perfect cookie crumb.
Step 2: Melt Chocolate
In a microwave-safe bowl, combine 6 ounces of your chopped semi-sweet chocolate and unsalted butter. Microwave in 30-second bursts, stirring in between, until everything blends into a glossy, smooth pool of chocolate. Set it aside to cool slightly, so it doesn’t cook your eggs in the next step.
Step 3: Mix Wet Ingredients
In a large mixing bowl, whisk together the granulated sugar, brown sugar, eggs, and vanilla extract until fully combined and slightly lighter in color. Pour in the slightly cooled chocolate-butter mixture and stir until the blend is completely smooth and unified.
Step 4: Combine Mixtures
Gradually add the dry ingredients into your wet mixture, folding gently with a spatula. Stop as soon as you see no more streaks — a little care here keeps the dough soft rather than tough. At this point, the dough will be thick and sticky, not unlike brownie batter.
Step 5: Chill Dough
Cover the bowl and refrigerate the dough for several hours, or even overnight. Chilling not only firms up the dough so it’s easier to handle, but it also allows the flavors to mingle for an even richer cookie.
Step 6: Form Cookies
Preheat your oven to 350°F (175°C) and line baking sheets with parchment paper. Divide the chilled dough into 12 equal portions. Gently flatten each, place a chunk from your remaining chocolate in the center, and fold the dough around it to seal. This secret center is where the “lava” magic happens when baked.
Step 7: Bake Cookies
Place the dough balls at least two inches apart on your prepared sheets. Bake for 10–12 minutes until the edges are set, but the centers still look a touch soft. The tops should be crackly but not dry — that’s your cue they’re ready.
Step 8: Serve
Let the cookies cool on the baking sheet for about five minutes, then transfer carefully to a wire rack. For the most dramatic lava effect, enjoy your Chocolate Lava Cookies warm — the centers will ooze pure bliss!
How to Serve Chocolate Lava Cookies
Garnishes
Turn these cookies into a show-stopping dessert by dusting them with powdered sugar, swirling a drizzle of warm chocolate sauce across the top, or adding a few fresh raspberries for a pop of color. A scoop of vanilla bean ice cream melting beside a warm cookie is pure magic.
Side Dishes
These cookies are delicious enough to stand on their own, but if you want to go the extra mile, pair them with a creamy coffee or a tall glass of cold milk. For a grown-up twist, try them with espresso or even a small pour of dessert wine — the chocolate and wine will bring out the very best in each other.
Creative Ways to Present
Arrange your Chocolate Lava Cookies on a rustic wooden board surrounded by bowls of whipped cream, fruit compote, and chopped nuts, letting everyone build their own treat. Stack them in a tower for an eye-catching party centerpiece, or tuck them into cute bakery boxes for the ultimate edible gift.
Make Ahead and Storage
Storing Leftovers
Place any leftover cookies in an airtight container at room temperature for up to three days. They’ll lose a bit of their signature gooeyness over time but will still be wonderfully fudgy and flavorful.
Freezing
Chocolate Lava Cookies freeze like a dream! Just let them cool, then wrap individually in plastic wrap and pop into a freezer-safe bag. Freeze for up to 2 months. When chocolate cravings hit, you’ll be ready.
Reheating
Warm a cookie in the microwave for 15-20 seconds and enjoy that freshly-baked, molten center once again. If reheating from frozen, let them thaw for a few hours first, then give them a short zap in the microwave for best results.
FAQs
Can I use dark or milk chocolate instead of semi-sweet?
Absolutely! Feel free to experiment with your favorite chocolate varieties for the centers or the dough itself. Dark chocolate brings a rich intensity, while milk chocolate will yield a sweeter, creamier lava.
Do I have to chill the dough?
Yes, chilling is key for the dough to firm up, which makes it easier to encase the chocolate and helps prevent the cookies from spreading too much, ensuring that molten middle stays put.
How do I tell when the cookies are baked just right?
Look for set edges with crackled tops, while the centers should still look a bit underdone. They’ll firm up slightly as they cool, but the gooey interior will remain molten if you don’t overbake.
Can I make the dough ahead of time and bake later?
Definitely! The dough can be mixed, covered, and stored in the fridge for up to 24 hours. When ready to bake, simply portion out, add chocolate centers, and proceed as usual.
Is it possible to make these Chocolate Lava Cookies gluten-free?
You sure can! Substitute the all-purpose flour with a 1:1 gluten-free baking blend. The results are still rich, fudgy, and perfect for sharing.
Final Thoughts
You don’t have to wait for a fancy occasion to treat yourself to a batch of Chocolate Lava Cookies. With their dramatic, flowing centers and irresistibly chocolatey flavor, these cookies are sure to impress anyone lucky enough to try them. Go ahead, bake a batch, and watch them disappear — they truly are chocolate joy in every bite!
Print
Chocolate Lava Cookies Recipe
- Total Time: Over 2 hours
- Yield: 12 cookies 1x
- Diet: Vegetarian
Description
Indulge in the decadent delight of Chocolate Lava Cookies, featuring a rich, gooey center surrounded by a chewy, chocolatey cookie. These irresistible treats are perfect for any chocolate lover!
Ingredients
Dry Ingredients
- 1 cup all-purpose flour
- 1/2 cup unsweetened cocoa powder
- 1 teaspoon baking powder
- 1/2 teaspoon salt
Wet Ingredients
- 10 oz semi-sweet chocolate, divided
- 1/2 cup unsalted butter
- 3/4 cup granulated sugar
- 1/2 cup brown sugar, packed
- 2 large eggs
- 1 teaspoon vanilla extract
Instructions
- Prepare Dry Ingredients – In a medium bowl, whisk together the flour, cocoa powder, baking powder, and salt. Set aside.
- Melt Chocolate – In a microwave-safe bowl, combine 6 oz chopped chocolate and butter. Microwave in 30-second intervals, stirring between each, until fully melted and smooth. Allow to cool slightly.
- Mix Wet Ingredients – In a large bowl, whisk together granulated sugar, brown sugar, eggs, and vanilla extract until well combined. Add the melted chocolate mixture and stir until smooth.
- Combine Mixtures – Gradually fold the dry ingredients into the wet ingredients until just combined. Do not overmix. The dough will be thick and somewhat sticky.
- Chill Dough – Cover the dough and refrigerate for at least a few hours.
- Form Cookies – Preheat oven to 350°F (175°C) and line baking sheets with parchment paper. Divide the dough into 12 equal portions. Flatten each portion, place a chocolate chunk in the center, and fold the dough around it, sealing completely.
- Bake Cookies – Place the cookie balls on the prepared baking sheets, spacing them about 2 inches apart. Bake for 10-12 minutes until the edges are set but the centers are still soft. The tops should be crackly.
- Serve – Allow cookies to cool on the baking sheet for 5 minutes before transferring to a wire rack. Serve warm to enjoy the molten center.
Notes
- You can use different types of chocolate for varying levels of sweetness.
- For an extra indulgent touch, serve with a scoop of vanilla ice cream.
- Prep Time: 30 minutes
- Cook Time: 10-12 minutes
- Category: Dessert
- Method: Baking
- Cuisine: American
Nutrition
- Serving Size: 1 cookie
- Calories: 280
- Sugar: 20g
- Sodium: 150mg
- Fat: 15g
- Saturated Fat: 9g
- Unsaturated Fat: 5g
- Trans Fat: 0g
- Carbohydrates: 35g
- Fiber: 3g
- Protein: 4g
- Cholesterol: 45mg
Keywords: Chocolate Lava Cookies, Dessert, Chocolate, Cookies, Baking

