
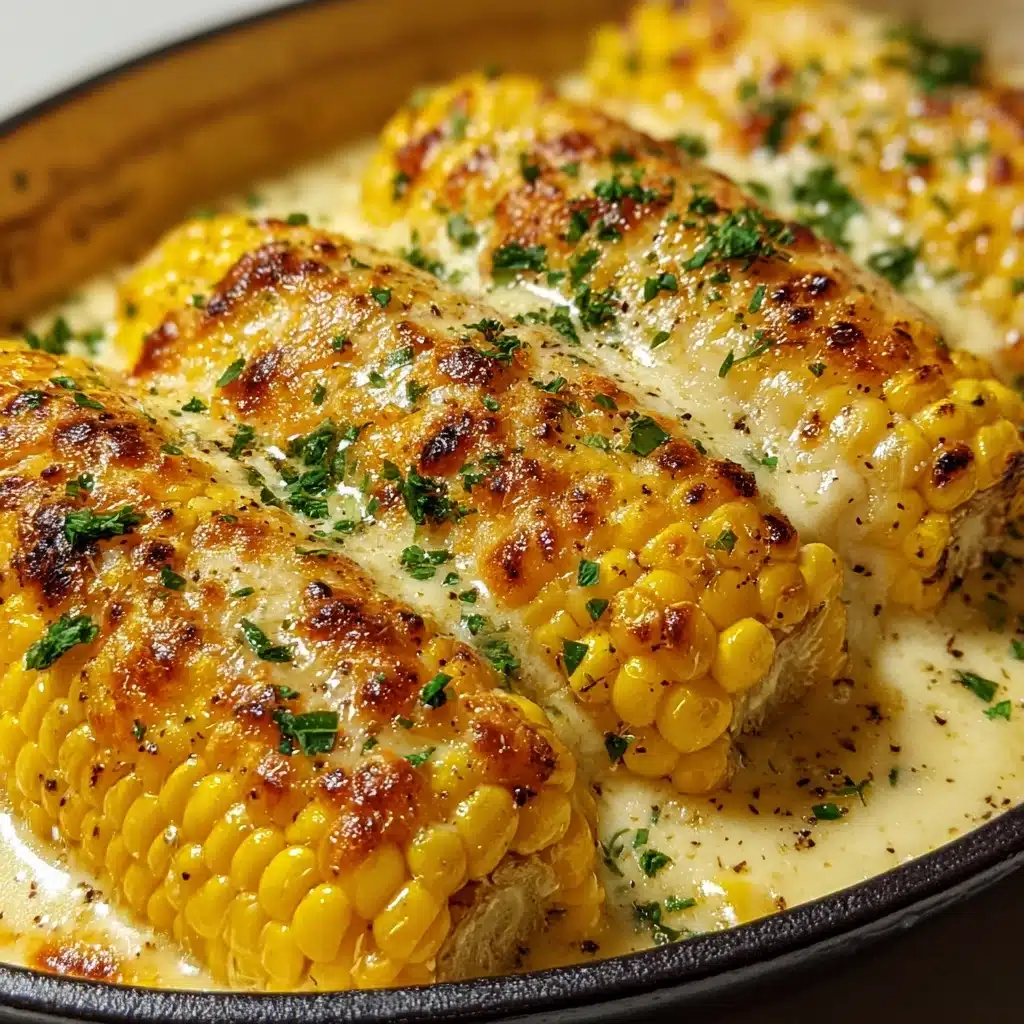
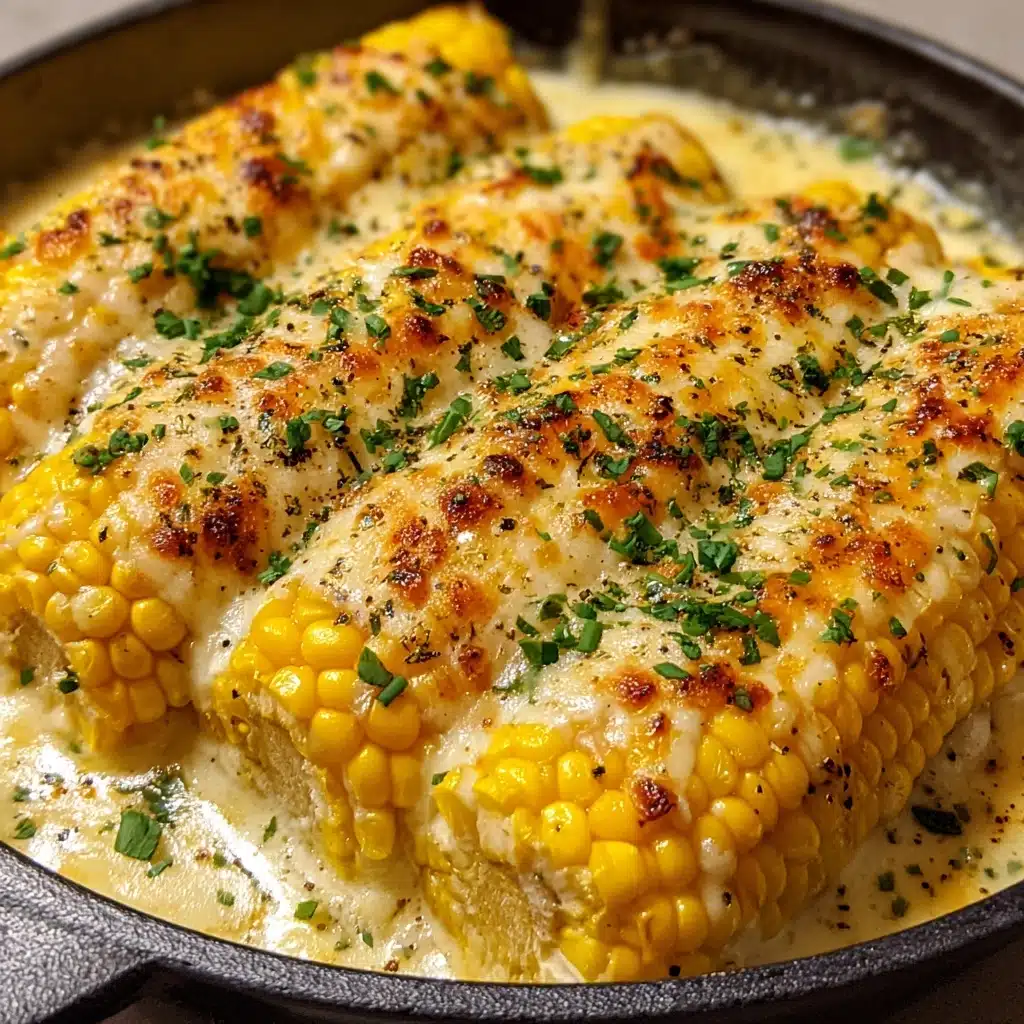
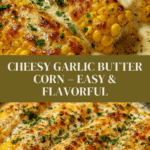
Cheesy Garlic Butter Corn on the Cob Recipe
If you’re searching for an irresistible twist on the classic summer favorite, look no further than Cheesy Garlic Butter Corn on the Cob. This dish combines fresh, sweet corn with a rich blend of zesty garlic butter, savory Parmesan, and a hint of vibrant smoked paprika. Whether you’re hosting a backyard barbecue or craving an easy weeknight treat, this recipe guarantees a dish that’s bursting with flavor and satisfying crunch. Trust me, one bite and you’ll want to make Cheesy Garlic Butter Corn on the Cob your new staple side!
Ingredients You’ll Need
The magic of Cheesy Garlic Butter Corn on the Cob lies in just a handful of simple, wholesome ingredients. Each one plays a starring role—from adding depth of flavor to providing creamy, decadent texture. Gather these easy-to-find items for your next craving and get ready for a side dish that wows in every way!
- Fresh Corn: Pick four ears with bright green husks and golden silk for the juiciest, sweetest bites.
- Light Butter: Two tablespoons melted makes the garlic butter rich without being too heavy—Land O’Lakes Light is a great choice.
- Garlic: Three cloves, minced, bring that bold savory flavor everyone will remember.
- Parmesan Cheese: One quarter cup of grated reduced-fat Parmesan lends a creamy, salty finish.
- Garlic Powder: Just a teaspoon enhances the garlicky goodness beautifully.
- Smoked Paprika: A half teaspoon adds a subtle smokiness and color that pops.
- Fresh Parsley: One tablespoon chopped (or a teaspoon dried) for herby brightness and a fresh look.
- Salt and Pepper: Season to taste—these basic essentials balance everything out.
- Red Pepper Flakes or Chili Powder (Optional): A pinch lights up each bite if you’re in the mood for a gentle kick.
How to Make Cheesy Garlic Butter Corn on the Cob
Step 1: Cook the Corn
Decide how you want to prepare your corn to bring out its natural sweetness. Boil it for 8–10 minutes in a large pot of salted water for a juicy, classic flavor. If you’re feeling adventurous, grill over medium-high heat after brushing lightly with oil—turning occasionally for 10–12 minutes results in smoky, charred kernels. Or, for a fuss-free and quick method, spritz the corn with cooking spray and pop it into the air fryer at 400°F for 10–15 minutes. No matter which way you pick, you can’t go wrong!
Step 2: Make the Garlic Butter Sauce
Now it’s time to turn up the flavor! In a small bowl, combine your melted light butter, minced garlic, garlic powder, smoked paprika, salt, and pepper. Give it a good stir until everything is blended. This lush, fragrant mixture is what sets Cheesy Garlic Butter Corn on the Cob apart from the average cob.
Step 3: Coat & Cheese It Up
Once the corn is cooked through and still hot, use a pastry brush to slather each ear with your freshly made garlic butter sauce. While the corn is still warm, sprinkle on the grated Parmesan cheese so it melts into all those little nooks and crannies. You’ll see (and smell) why people can’t get enough of Cheesy Garlic Butter Corn on the Cob!
Step 4: Garnish & Serve
Finish the magic by showering the corn with a sprinkle of chopped fresh parsley and, if you love a little heat, a pinch of red pepper flakes or chili powder. Serve immediately, and get ready for that first, blissful bite.
How to Serve Cheesy Garlic Butter Corn on the Cob
Garnishes
Cheesy Garlic Butter Corn on the Cob absolutely shines with a pop of color and extra zest on top. Fresh parsley adds an herby contrast to the richness while a very light sprinkle of red pepper flakes or chili powder gives that surprise burst of flavor. Feel free to try other fresh chopped herbs like chives or cilantro for even more brightness!
Side Dishes
This corn pairs beautifully with nearly anything fresh off the grill—think juicy burgers, barbecue chicken, or even grilled portobello mushrooms for a meatless option. It’s also wonderful with crisp salads, roasted potatoes, or a simple tomato salad for a breezy summer meal. The cheesy, garlicky flavors make Cheesy Garlic Butter Corn on the Cob a fun star on any dinner table.
Creative Ways to Present
You can serve the cobs whole with colorful napkins or cut each one into halves or thirds for easy sharing at picnics. For a playful twist, skewer each portion with a sturdy stick or corn holder and arrange upright in a rustic basket. Or, cut the corn off the cob and toss with the sauce and cheese for an irresistible, shareable salad version of this favorite.
Make Ahead and Storage
Storing Leftovers
If you have leftover Cheesy Garlic Butter Corn on the Cob (though it will disappear quickly), wrap each ear in foil or plastic wrap and place in the fridge. It will keep at its best for up to three days, maintaining that wonderful cheesy-garlic flavor.
Freezing
For longer storage, allow the corn to cool completely then wrap each cob tightly in plastic or foil. Place the wrapped cobs in a resealable freezer bag, expelling as much air as possible. This way, your Cheesy Garlic Butter Corn on the Cob can be stored frozen for up to two months without losing too much flavor or texture.
Reheating
The easiest way to reheat is in the microwave: wrap an ear in a damp paper towel and heat in 30-second bursts until warmed through. For a slightly crispier finish, you can reheat in a 350°F oven (wrapped in foil) for 10–12 minutes. Either way, the garlicky cheese flavors will shine just as vibrantly as when first made!
FAQs
Can I use frozen or canned corn instead of fresh?
Fresh corn is always best for Cheesy Garlic Butter Corn on the Cob, thanks to its crisp texture and sweet flavor. If you’re in a pinch, you can use frozen corn cobs (thaw first); canned corn doesn’t work as well since the kernels are already removed from the cob and tend to be softer.
What can I substitute for Parmesan cheese?
If you don’t have Parmesan, try Pecorino Romano for a saltier kick, or shredded mozzarella if you prefer something milder and meltier. A blend of cheeses works too—just make sure to choose one that melts easily into the warm corn.
Is this recipe gluten free?
Yes! Cheesy Garlic Butter Corn on the Cob contains no wheat or gluten-based ingredients, making it a friendly option for gluten-free guests. Just double check any store-bought butter or cheese for added fillers if you’re highly sensitive.
How spicy is this dish?
The basic recipe isn’t spicy at all—the spice comes only from the optional red pepper flakes or chili powder. Add as much or as little as you like to suit your heat preference, or skip it for a completely mild, kid-friendly corn on the cob.
Can I prepare the butter sauce ahead of time?
Absolutely! You can mix up the garlic butter sauce and keep it refrigerated for up to three days. Let it come to room temperature or gently reheat before brushing onto your corn for best results.
Final Thoughts
This Cheesy Garlic Butter Corn on the Cob is the kind of recipe that brings everyone running to the table—bold flavors, simple steps, and loads of good memories. It’s a go-to for summertime meals, but honestly, I find reasons to make it all year. If you love savory, cheesy, buttery goodness, give this recipe a try and watch it become a new favorite in your home too!
Print
Cheesy Garlic Butter Corn on the Cob Recipe
- Total Time: 25 minutes
- Yield: 4 servings 1x
- Diet: Vegetarian
Description
Enjoy the delicious flavors of Cheesy Garlic Butter Corn on the Cob with this easy-to-follow recipe. Perfect for summer BBQs or as a side dish any time of the year!
Ingredients
Corn on the Cob:
- 4 ears fresh corn (husks removed)
Garlic Butter Sauce:
- 2 tbsp light butter (melted, e.g., Land O’Lakes Light)
- 3 cloves garlic (minced)
- 1 tsp garlic powder
- 1/2 tsp smoked paprika
- Salt and pepper to taste
- Optional: Pinch of red pepper flakes or chili powder
Cheese Topping:
- 1/4 cup grated reduced-fat Parmesan cheese
- 1 tbsp fresh parsley (chopped, or 1 tsp dried)
Instructions
- Cook the Corn: Boil a large pot of water. Add corn and cook for 8-10 minutes, grill for 10-12 minutes, or air-fry at 400°F for 10-15 minutes.
- Make the Garlic Butter Sauce: Mix melted light butter, minced garlic, garlic powder, smoked paprika, salt, and pepper in a bowl.
- Coat & Cheese It Up: Brush each cooked corn ear with the garlic butter mixture. Sprinkle Parmesan cheese over the warm corn.
- Garnish & Serve: Top with fresh parsley and red pepper flakes. Serve hot!
- Prep Time: 10 minutes
- Cook Time: 15 minutes
- Category: Side Dish
- Method: Boil, Grill, Air-Fry
- Cuisine: American
Nutrition
- Serving Size: 1 ear of corn with toppings
- Calories: 180
- Sugar: 5g
- Sodium: 250mg
- Fat: 6g
- Saturated Fat: 3g
- Unsaturated Fat: 2g
- Trans Fat: 0g
- Carbohydrates: 30g
- Fiber: 3g
- Protein: 5g
- Cholesterol: 10mg
Keywords: Corn on the Cob, Cheesy Corn, Garlic Butter Corn, BBQ Side Dish