
Homemade Red Velvet Brownie Bites Recipe
Introduction
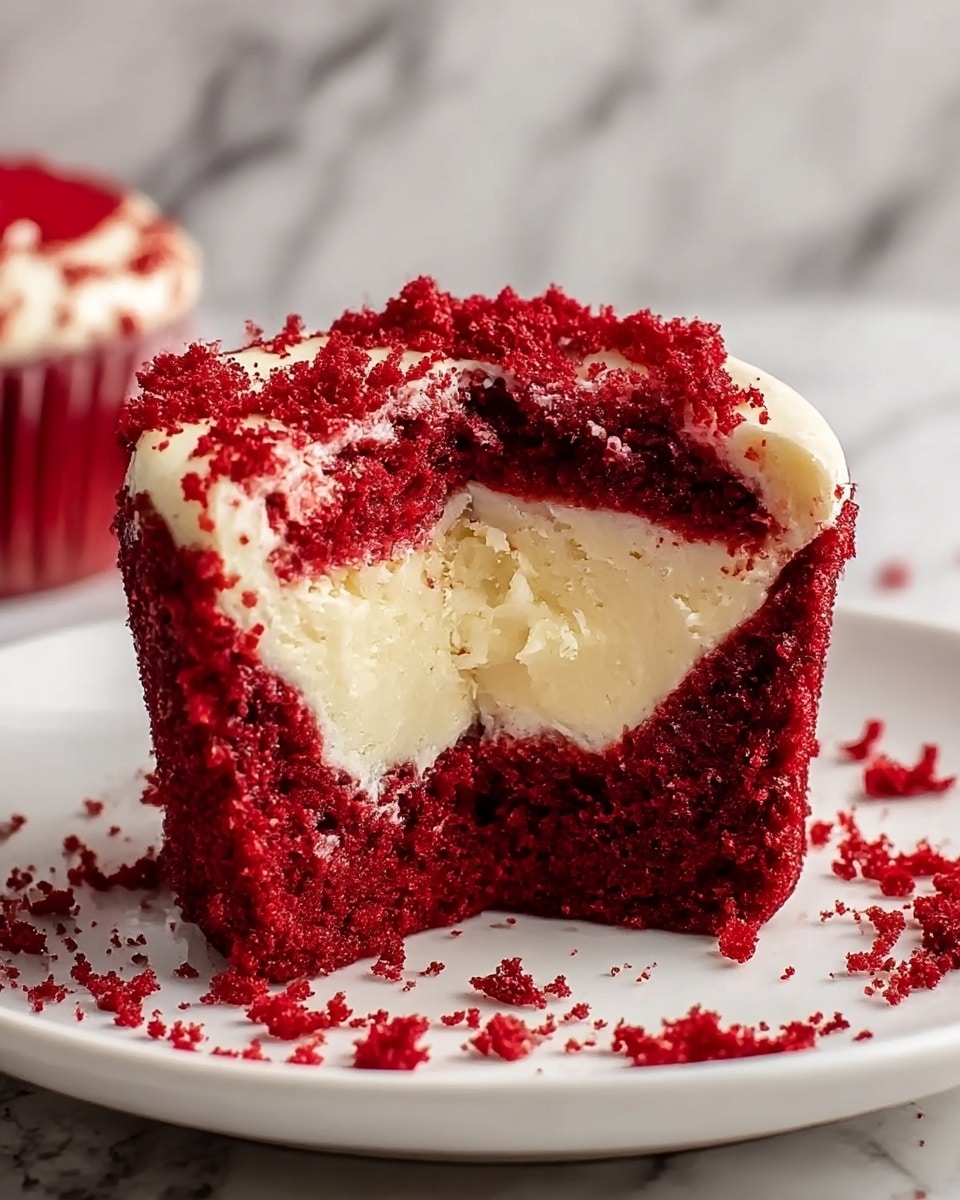
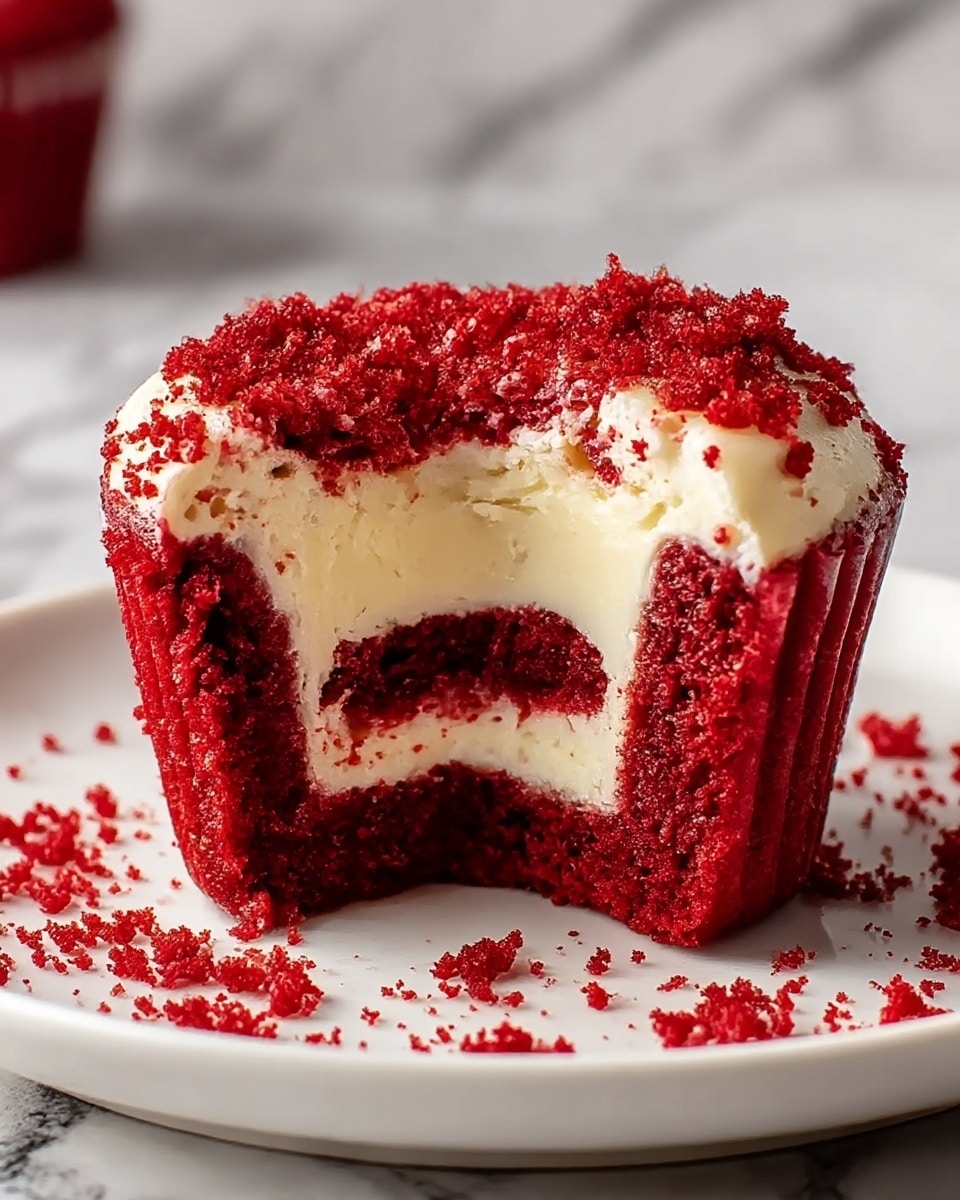
These homemade red velvet brownie bites are a delightful twist on classic brownies, featuring a luscious cream cheese swirl. Perfectly fudgy and visually stunning, they make a great treat for any occasion.
Ingredients
- 9 tbsp butter (unsalted, recommended Kerrygold)
- 1 1/4 cups sugar
- 1/4 cup cocoa powder (sifted)
- 1/2 tsp vanilla extract
- 1 tbsp red food coloring
- 1/8 tsp salt
- 1/4 tsp espresso powder
- 1/2 tsp vinegar
- 2 eggs
- 3/4 cup all-purpose flour (such as King Arthur)
- 9 oz cream cheese (room temperature, about 70°F)
- 3 tbsp sugar (for cheesecake swirl)
- 1/2 tsp vanilla extract (for cheesecake swirl)
- 1 egg yolk (for cheesecake swirl)
Instructions
- Step 1: Preheat the oven to 350°F and generously grease a mini muffin pan with butter or cooking spray, making sure to coat sides and bottoms to prevent sticking.
- Step 2: Sift the cocoa powder into a small bowl to remove lumps. Ensure all ingredients, especially cream cheese and eggs, are at room temperature for smooth blending.
- Step 3: In a medium bowl, melt the butter. Whisk together the melted butter, sugar, sifted cocoa powder, vanilla, red food coloring, salt, espresso powder, and vinegar until combined.
- Step 4: Add eggs one at a time, whisking fully after each. Gently fold in the flour until just combined, avoiding overmixing to keep brownies tender.
- Step 5: In a separate bowl, beat the cream cheese with sugar and vanilla until smooth and creamy. Fold in the egg yolk gently until combined.
- Step 6: Spoon about 1 tablespoon of brownie batter into each mini muffin cup, filling halfway. Add 1 teaspoon of cream cheese mixture on top, then another teaspoon of brownie batter to seal.
- Step 7: Use a toothpick to swirl the layers gently in a figure-eight or circular motion, creating a marbled effect without fully blending.
- Step 8: Bake for 12 minutes until tops are set but centers remain slightly soft. Let cool in the pan for 5 minutes before carefully removing with a thin knife or spatula.
- Step 9: Transfer to a wire rack and allow to cool completely before serving.
Tips & Variations
- Using room temperature cream cheese and eggs helps achieve a smooth, creamy swirl without graininess.
- For a more intense red color, add an extra 1/2 tablespoon of red food coloring.
- Espresso powder enhances the chocolate flavor without adding a coffee taste—don’t skip it if you want rich brownies.
- Try adding chopped walnuts or pecans to the brownie batter for added texture.
Storage
Store the brownie bites in an airtight container in the refrigerator for up to 4 days. Bring to room temperature before serving or warm briefly in the microwave for a soft, fudgy texture.
How to Serve
Serve this delicious recipe with your favorite sides.
FAQs
Can I make these brownie bites without a mini muffin pan?
While a mini muffin pan works best for portion size and shaping, you can bake the batter in a regular brownie pan. Adjust baking time accordingly and swirl the cream cheese on top before cutting into squares.
Can I freeze the red velvet brownie bites?
Yes, you can freeze them in an airtight container for up to 2 months. Thaw overnight in the refrigerator and warm slightly before serving for the best texture.
Print
Homemade Red Velvet Brownie Bites Recipe
- Total Time: 27 minutes
- Yield: 24 mini brownie bites 1x
Description
These Homemade Red Velvet Brownie Bites combine the rich fudginess of classic brownies with the creamy tang of a cheesecake swirl. Made in a mini muffin pan, these bite-sized treats feature a vibrant red velvet batter enhanced with cocoa and espresso powder, topped with a smooth cream cheese mixture swirled throughout. Perfect for parties or an indulgent snack, they bake quickly to a moist, tender texture with a beautiful marbled appearance.
Ingredients
Brownie Mixture
- 9 tbsp unsalted butter (preferably Kerrygold)
- 1 1/4 cups sugar
- 1/4 cup cocoa powder (sifted)
- 1/2 tsp vanilla extract
- 1 tbsp red food coloring
- 1/8 tsp salt
- 1/4 tsp espresso powder
- 1/2 tsp vinegar
- 2 large eggs
- 3/4 cup all-purpose flour (King Arthur recommended)
Cheesecake Swirl
- 9 oz cream cheese (room temperature, ~70°F)
- 3 tbsp sugar
- 1/2 tsp vanilla extract
- 1 egg yolk
Instructions
- Preheat and Prep: Preheat your oven to 350°F (175°C). Generously grease a mini muffin pan with butter or cooking spray, ensuring each cup is well coated on the sides and bottom to prevent sticking and facilitate easy removal.
- Sift Cocoa and Prepare Ingredients: Sift the cocoa powder into a small bowl to remove lumps, ensuring a smooth batter. Make sure all ingredients, especially cream cheese and eggs, are at room temperature for optimal mixing and texture.
- Make Brownie Batter: In a medium bowl, melt the butter and combine it with the sugar, sifted cocoa powder, vanilla, red food coloring, salt, espresso powder, and vinegar. Whisk until well blended. Add the eggs one at a time, fully incorporating each before adding the next. Gently fold in the flour just until no streaks remain to keep the brownies tender.
- Prepare Cheesecake Swirl: In a separate bowl, beat the cream cheese, sugar, and vanilla using a whisk until smooth and creamy, about one minute. Fold in the egg yolk gently to avoid overmixing and graininess.
- Assemble Brownie Bites: Spoon about 1 tablespoon of brownie batter into each mini muffin cup, filling halfway. Add about 1 teaspoon of cheesecake filling on top, then top with another teaspoon of brownie batter. Use a toothpick or skewer to swirl the layers carefully, creating a marbled pattern without overmixing.
- Bake: Bake in the preheated oven for 12 minutes, or until the tops are set and spring back lightly when touched, with centers remaining slightly soft and fudgy.
- Cool and Serve: Let the brownie bites cool in the pan for 5 minutes to firm up. Carefully remove them using a thin knife or offset spatula to prevent breaking. Allow to cool completely on a wire rack before serving.
Notes
- Ensure all ingredients, especially cream cheese and eggs, are at room temperature for better mixing and texture.
- Sifting the cocoa powder prevents lumps and ensures an even batter.
- Do not overmix after adding flour to avoid tough brownies.
- Be gentle when swirling the cheesecake into the brownie batter to keep a distinct marbled effect.
- Use a greased or non-stick mini muffin pan to help with clean removal of bites.
- Allow bites to cool completely to set textures properly before eating.
- Prep Time: 15 minutes
- Cook Time: 12 minutes
- Category: Dessert
- Method: Baking
- Cuisine: American
Keywords: red velvet brownie bites, cheesecake swirl brownies, mini brownies, red velvet dessert, bite-sized brownies, holiday treats


