
S’mores Icebox Cake Recipe
Introduction
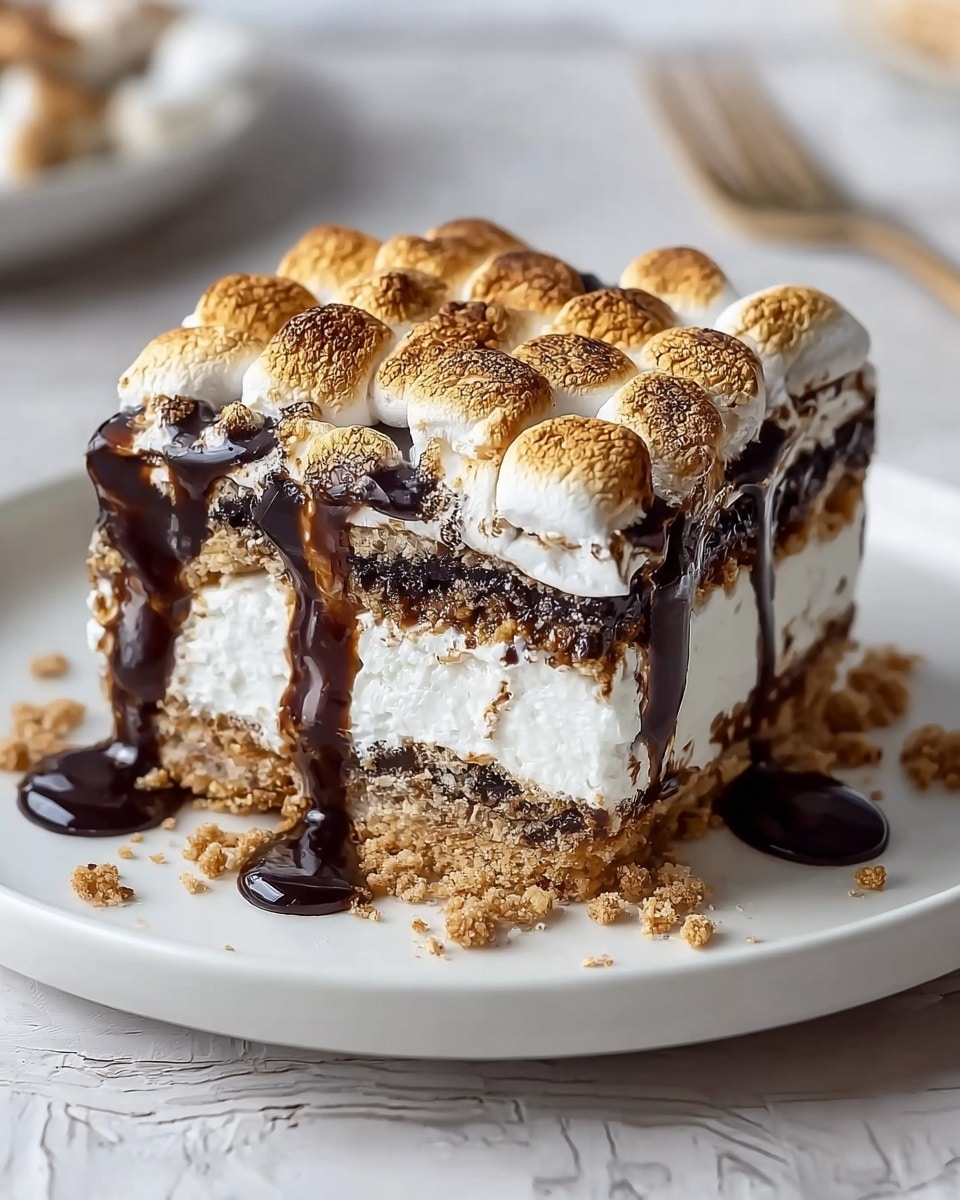
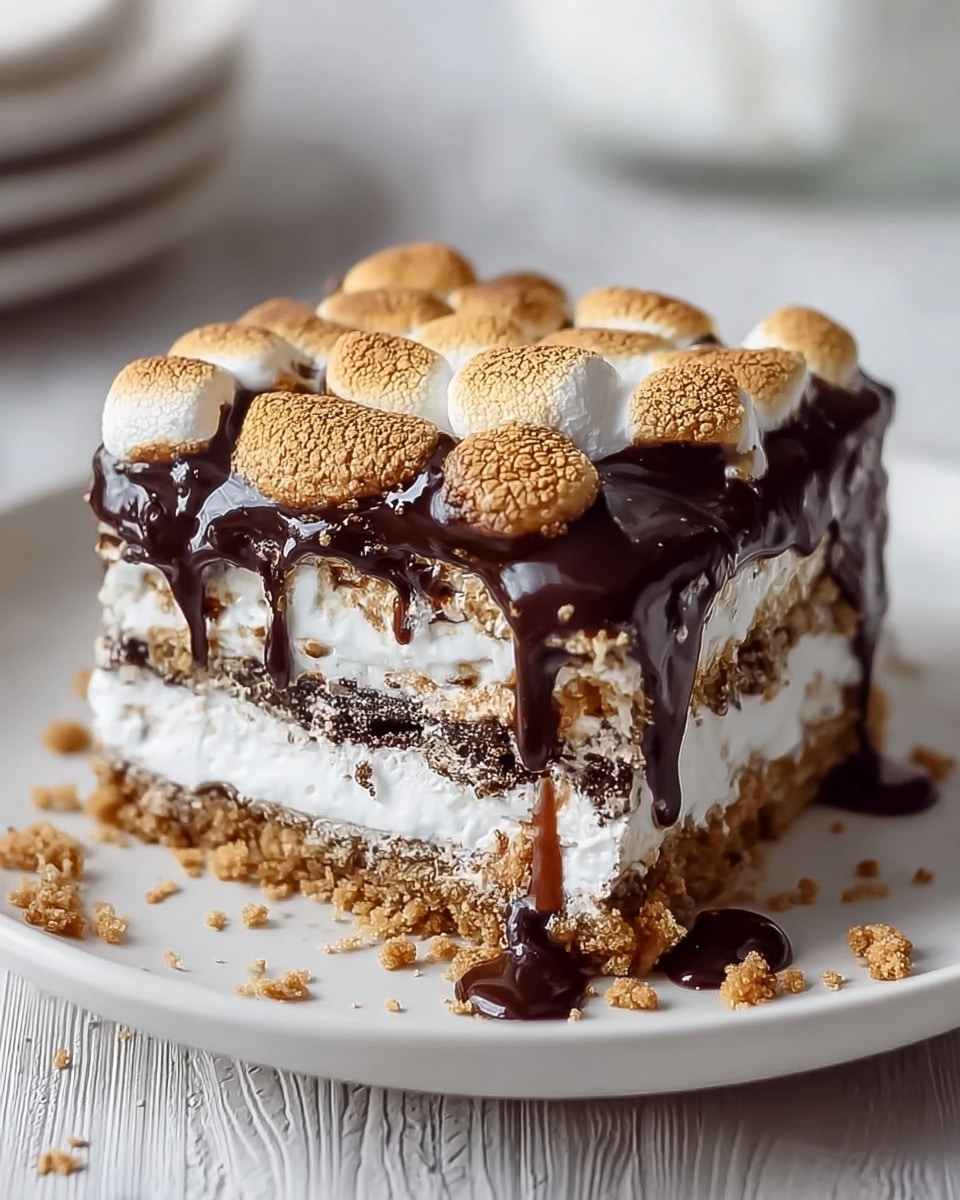
S’mores Icebox Cake is a layered dessert that brings together the nostalgic flavors of campfire s’mores in an elegant, easy-to-make treat. Creamy marshmallow layers, rich chocolate, and crunchy graham crackers combine for a delightful texture and flavor experience. Perfect for warm gatherings or cozy nights in, this cake is as stunning as it is delicious.
Ingredients
- 9 oz dairy-free whipped topping (such as So Delicious CocoWhip)
- 7.5 oz jar gluten-free marshmallow creme or fluff
- 2 cups gluten-free mini marshmallows
- 9 oz dark or semi-sweet chocolate chips (Enjoy Life recommended)
- 3/4 cup lite coconut milk (canned for best creaminess)
- 2 boxes (8 oz each) gluten-free graham crackers (Kinnikinnick S’moreables recommended)
Instructions
- Step 1: In a large bowl, combine the dairy-free whipped topping and marshmallow creme. Whisk until smooth with some lumps remaining for texture. Fold in the mini marshmallows. Refrigerate this mixture until well chilled.
- Step 2: Reserve 2 tablespoons of chocolate chips for garnish. Place the rest in a medium bowl. Heat the coconut milk in the microwave for about 45 seconds until simmering. Pour over the chocolate chips and let sit for 5 minutes, then whisk until smooth to make a ganache. Set aside.
- Step 3: Line a 5×9” loaf pan with saran wrap, leaving long overhangs for easy removal later. Spread 1 cup of the marshmallow mixture evenly in the bottom.
- Step 4: Add a layer of graham crackers, breaking pieces if needed to fit snugly. Press down gently to form an even layer.
- Step 5: Add another 1 cup of the marshmallow mixture and spread evenly over the crackers. Then, pour and smooth 1/2 cup of the chocolate ganache on top.
- Step 6: Repeat layering—graham crackers, marshmallow mixture, and chocolate ganache—two more times, ensuring even layers.
- Step 7: Cover the top with saran wrap and refrigerate overnight to allow flavors to meld and layers to set.
- Step 8: To serve, unwrap the cake from the pan using the overhanging saran wrap and invert onto a cutting board. Sprinkle with reserved chocolate chips and crumbled graham crackers. Slice with a sharp knife and enjoy.
Tips & Variations
- Try aquafaba instead of whipped topping for a lighter vegan option, though it won’t be as rich.
- Swap marshmallow fluff with nut butter (almond or peanut) for a nutty twist.
- Add a layer of Nutella for extra chocolatey richness.
- If short on time, store-bought graham crackers work fine; homemade adds extra charm.
- Warm marshmallow fluff slightly if it’s hard to mix for a smoother blend.
- Use high-quality chocolate chips for the best flavor and smoother ganache.
Storage
Store leftover cake slices in an airtight container in the refrigerator for 3-4 days. Serve chilled or let sit at room temperature for a softer texture. For longer storage, freeze individual slices for 2-3 months; thaw overnight in the fridge before serving.
How to Serve
Serve this delicious recipe with your favorite sides.
FAQs
Can I use regular whipped topping instead of dairy-free?
Yes, you can use regular whipped topping if you don’t need the dessert to be dairy-free. The texture and flavor will be similarly delicious.
Do I have to refrigerate the cake overnight?
Refrigerating overnight is best as it allows the layers to set and meld, creating the perfect texture. If short on time, a minimum of 4 hours will help, but overnight chilling is recommended for optimal results.
Print
S’mores Icebox Cake Recipe
- Total Time: 8 hours 20 minutes
- Yield: 8 servings 1x
- Diet: Gluten Free
Description
S’mores Icebox Cake is a nostalgic, layered dessert combining gluten-free graham crackers, fluffy marshmallows, rich chocolate ganache, and dairy-free whipped topping. This no-bake icebox cake layers creamy marshmallow fluff with chocolate and crunchy graham crackers, chilled overnight to meld the flavors into an indulgent treat perfect for summer get-togethers or cozy family nights.
Ingredients
Essential Components
- 9 oz dairy-free whipped topping (e.g., So Delicious CocoWhip)
- 7.5 oz jar gluten-free marshmallow creme or fluff
- 2 cups gluten-free mini marshmallows
- 9 oz dark or semi-sweet chocolate chips (recommend Enjoy Life brand)
- 3/4 cup lite canned coconut milk
- 2 boxes (8 oz each) gluten-free graham crackers (e.g., Kinnikinnick S’moreables)
Instructions
- Combine Toppings for the Creamy Base: In a large bowl, whisk together the dairy-free whipped topping and marshmallow fluff until smooth but still with some lumps for texture. Gently fold in the mini marshmallows. Refrigerate this mixture until well chilled.
- Melt Chocolate to Create the Ganache: Reserve 2 tablespoons of chocolate chips for later topping. Place the remaining chocolate chips in a medium bowl. Heat canned coconut milk in the microwave for about 45 seconds until gently simmering. Pour it over the chocolate chips and let sit for 5 minutes to soften, then whisk until smooth. Set aside.
- Line Your Pan for Easy Assembly: Line a 5×9 inch loaf pan with saran wrap, leaving overhang on the sides for easy cake removal. Spoon 1 cup of the marshmallow mixture onto the bottom and spread evenly.
- Layer with Graham Crackers: Add a layer of gluten-free graham crackers on top of the marshmallow base, breaking or cutting to fit the pan if necessary.
- Repeat Layers for Depth: Spread another cup of the marshmallow mixture evenly over the graham crackers, then drizzle 1/2 cup of the chocolate ganache over the marshmallow layer, smoothing it out carefully.
- Pure Layering Bliss: Repeat the sequence—graham crackers, marshmallow mixture, and chocolate ganache—two more times, ensuring even layers.
- Chill to Perfection: Cover the top tightly with saran wrap and refrigerate overnight. This chilling melds the flavors and softens the graham crackers for perfect texture.
- Unwrap and Serve: When ready to serve, remove the saran wrap from the top, invert the cake onto a cutting board, and gently pull off the saran wrap from the pan. Sprinkle the top with reserved chocolate chips and crumbled graham crackers for decoration. Slice with a sharp knife and serve.
Notes
- Use high-quality chocolate chips for the best flavor and smooth ganache.
- Ensure even layers during assembly for a beautiful presentation.
- If marshmallow fluff is thick, gently warm it to ease mixing.
- Leftover cake can be stored airtight in the fridge for 3-4 days or frozen for 2-3 months.
- Serve chilled or let slices sit at room temperature briefly before eating for best texture.
- Try substitutions like aquafaba for whipped topping or nut butter instead of marshmallow fluff for vegan or nutty variations.
- Prep Time: 20 minutes
- Cook Time: 0 minutes
- Category: Dessert
- Method: No-Cook
- Cuisine: American
Keywords: S’mores Icebox Cake, gluten-free dessert, no-bake dessert, dairy-free whipped topping, marshmallow cake, vegan option dessert, layered cake, chocolate ganache dessert

